Repair: fixing missing vertical lines on an original Gameboy
I have 160 missing vertical lines and I must scream.
Published on Sep 21 2025
In this post I’m going to be diving into repairing an infamous problem that plagues the second-hand market for original Gameboys: missing vertical lines on the screen. I wouldn’t call this a repair guide per se, maybe more like supplemental reading.
Why repair when you can replace?
There are no shortage of high-quality IPS displays available for the original Gameboy. However, if you’re even a little bit of a Gameboy purist, you’ll soon see that these screens are radical departures from the original LCD on the Gameboy. That’s essentially the point - the original screen was pretty awful. But if you’re after authenticity or reliving childhood memories you might not find it staring back at you with a drop-in IPS display.
Fact: You can see yourself in a nice screen when it’s off. Even at excellent viewing angles. Downright unflattering viewing angles. You really want that? Are you sure that’s what you think you want? You can’t stare at yourself and have an existential crisis on an original Gameboy screen, that’s all I’m saying. It was designed like that. They knew. They knew.
Also, some Gameboy games actually depend on the fact that they were going to be played on, well, a Gameboy screen, and get a little freaky otherwise. Some of those games do weird technical things that I don’t understand, and others just used the ghosting on the display as a feature instead of a bug. The two display technologies aren’t apples to apples, and that’s going to determine which one you prefer.
For me personally, I specifically sought out to repair a Gameboy, back to its original working condition because I thought it would be fun, and a rewarding challenge. Plus, if I can get this broken Gameboy working, I can also try another interesting challenge - undoing it’s original condition by installing a backlight mod and a bivert chip, something that improves the original display without throwing out that old dot matrix altogether.
The Dot Matrix display
The Gameboy use a dot matrix display. It’s in the name. The G stands for Dot Matrix. So does the “DM” in DMG, I’m pretty sure. It is quite literally a matrix (if you’re not a nerd that’s called a grid) of dots, which are our pixels. There’s a tiny gap in-between pixels, which contributed to the iconic ‘Gameboy look’ that emulators and FPGA recreations either proudly remove or replicate today, depending on the users preference. To me, the blocky grid with gaps is the iconic look. It’s not just about tiling window managers either.
Here’s an example mockup I whipped up in Inkscape which definitely didn’t take me half as long as the screen repair itself did:
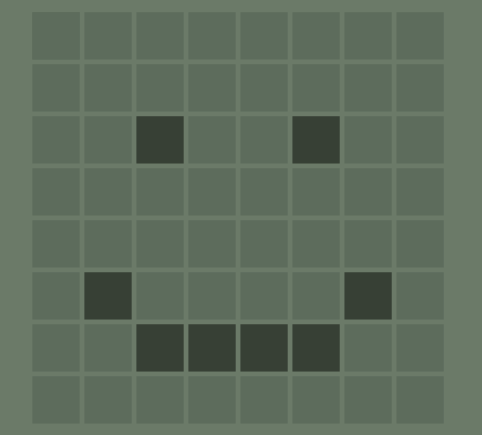 Example mockup of a happy dot matrix display
This is our dot matrix display in all its glory. Now, if for some strange reason™ that we will totally not see later on, were to have a failure in the dot matrix display and lose say, some vertical lines, we could get something that looks like this:
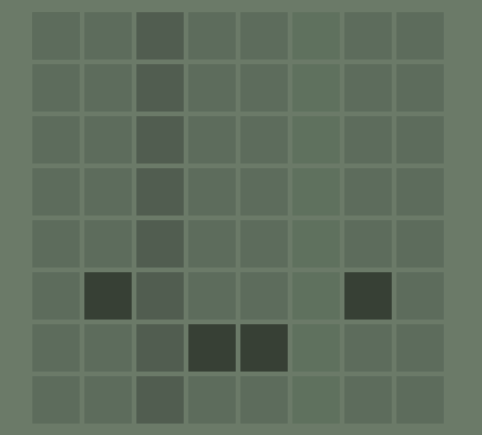 Example mockup of a sad, lifeless, worthless dot matrix display
We might have lines that are anywhere from gone, faint, or intermittent. You get the picture (hopefully).
The screen problem
In a horrifying turn of events, I appear to have just manifested the exact problem I had described above. This theoretical Lovecraftian demon has leapt off of (or rather onto) the screen. Horrifying, and worse still, entirely unavoidable had I not said the magic incantation that precipitated this unfortunate series of events.
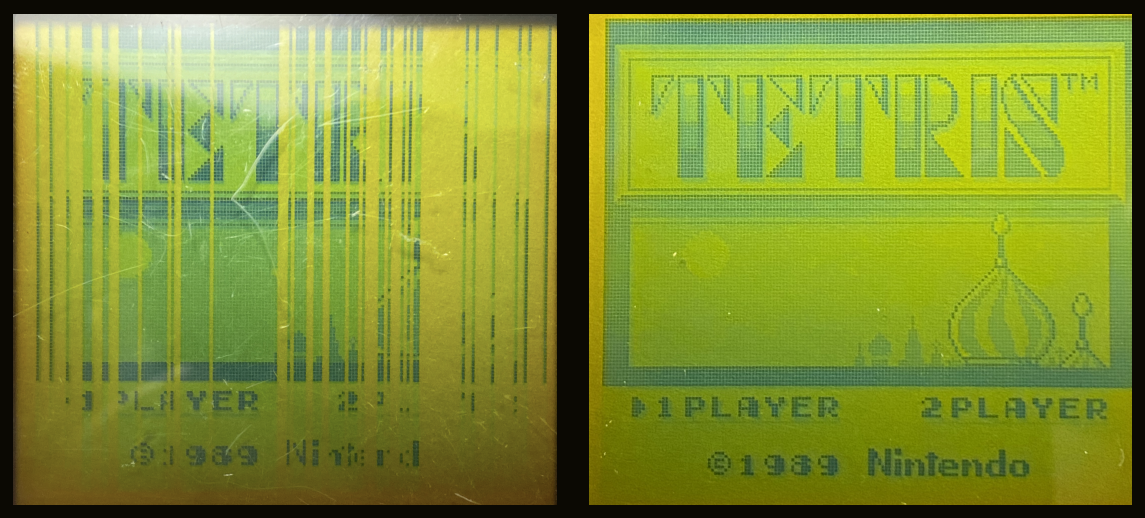 A Gameboy screen exhibiting the ‘vertical line issue’ on the left, and a functioning Gameboy screen on the right
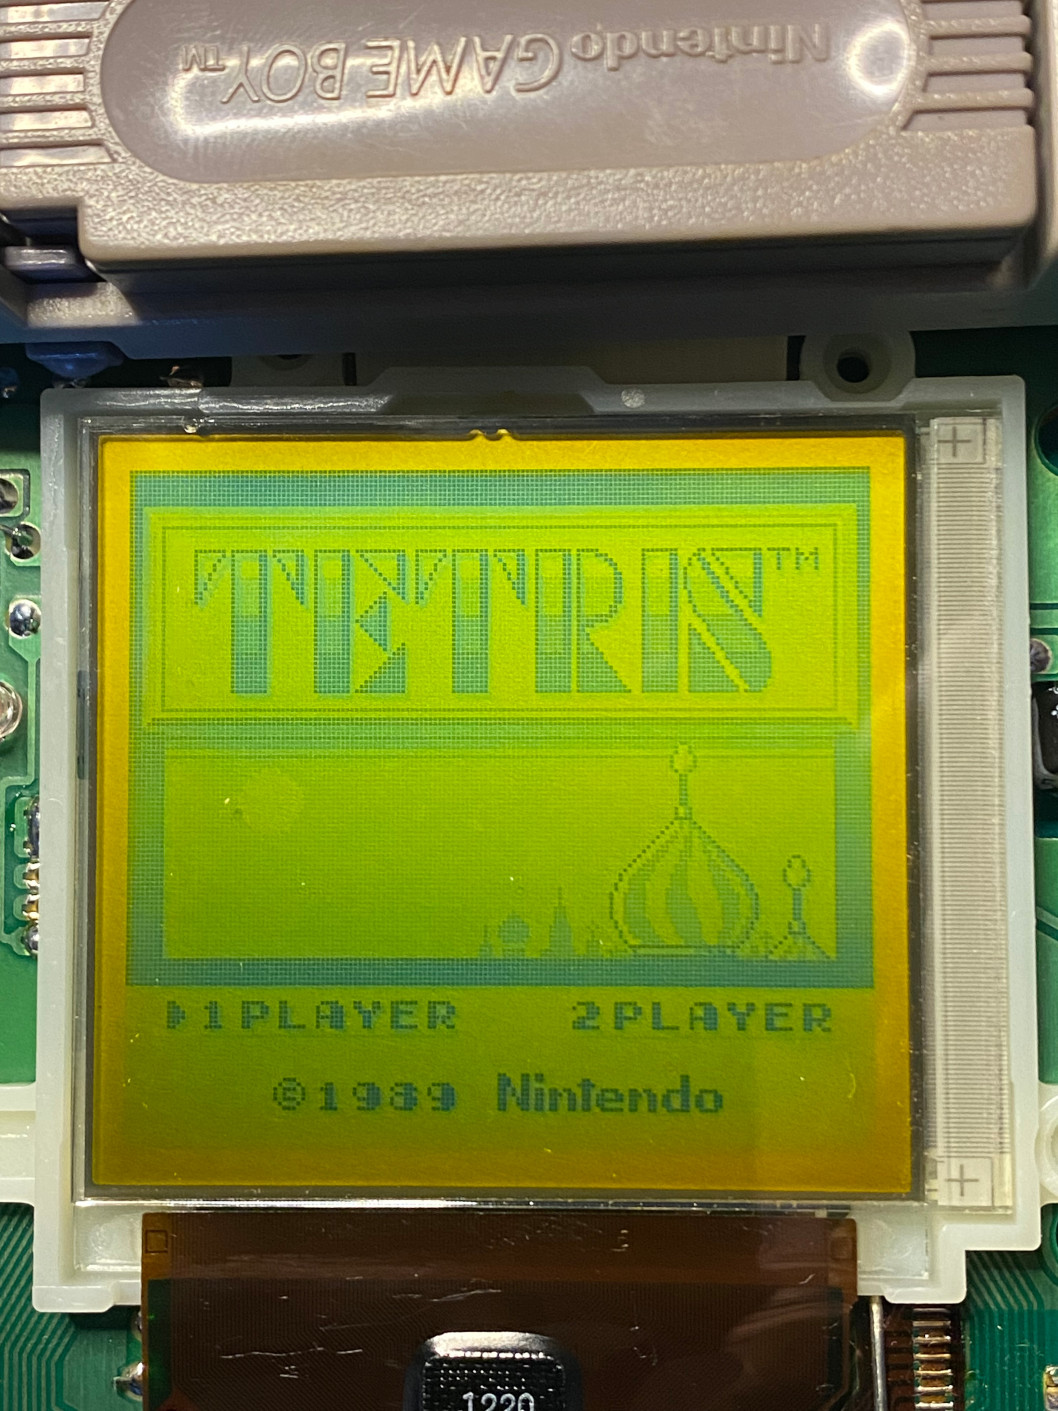
Here are two (crappy) smartphone photos I took laid side-by-side. Both Gameboys are showing the main screen for Tetris, however the screen on the left is suffering from the infamous vertical lines problem, while the one on the right is perfect (and by perfect, I mean the awful kind of perfect that makes the original Gameboy so iconic).
These aren’t any two random Gameboys off the internet, however. They’re my two random Gameboys I bought off the internet. The working one is my actual Gameboy, and the broken one is a Gameboy I bought for the explicit purpose of learning how to repair Gameboys. Plus, if the repair works, I’ll have a guinea pig unit that I can do a backlight + bivert mod on without endangering my ‘actual’ Gameboy.
What causes it?
Much like arthritis, the answer is bad joints.
The Gameboys (in)famous dot matrix screen connects to the main PCB via two ribbon cables - one is responsible for the horizontal lines on the display, and the other for vertical lines. You’re reading that correctly, it’s two separate cables. There are over 100 million original Gameboys who will testify that they have two ribbon cables (and that you were there on the night of the murder).
I’m not sure of the exact mechanism by which this cables are connected (it’s suggested it may be something called Tape-Automated Bonding, or it could be something else) but the problem is the same regardless, when the ribbon cable connection becomes loose or degraded, we get missing vertical lines on the Gameboy.
(You might be wondering, what happens if the connection for the horizontal ribbon cable becomes weak? The answer is yes, you’ll have the same problem but sideways - missing horizontal lines instead of vertical ones, and that ribbon cable location is in a much less ergonomic location too)
The solution
The solution is to simply fix the joints (sorry arthritis). It’s not a textbook solder reflow job, but is oddly reminiscent of one. If there is solder involved, we can’t see it, touch it with our iron, or get to it directly. We just have a fixed ribbon cable, however, we can still apply heat to it and reflow the connections underneath the ribbon cable. The only difference is that we have an element of danger to spice things up (i.e don’t burn the ribbon cable). So it’s like a spicy reflow.
Step 0: Quick function test
Before fixing something, it’s a good idea to do a full function test so that you’re aware of everything that does and doesn’t work. When you’re finished your repair, you won’t be left wondering “wait, was the headphone jack always broken?”.
My checklist going in looks like this. Note I didn’t test the last two, so I will be wondering if the headphone jack was always broken, or if I broke it during the repair. I never use the headphone jack personally, so whether it works will be a pleasant surprise years from now when I bring my Gameboy on a plane like a real grown-up.
- Powers on correctly
- Boot screen logo
- Loads and reads from a cartridge
- Sound working
- Volume dial working
- Contrast dial working
- All buttons are working
- Audio output from the headphone jack working
- DC power input working
If there are USB to DC adapters for the Gameboy, I could power the Gameboy on a plane, with a plane…
Step 1: Disassembly
I’m going to gloss over the boring bits of this that are better explained elsewhere a hundred times over. This is just what I did:
After removing the cartridge and batteries (but keeping them close by, this repair actually involves ‘live’ surgery while the unit is powered on), all the screws need to be removed. At that point I had a gameboy sandwich held together by a fragile ribbon cable, which needs to be disconnected very carefully. Then I laid the larger half (the one without the screen) aside for now, but we will need it shortly.
Once you’re inside the Gameboy the screws are now Phillips head, not tri-wing. Surprise! They were tri-wing before now. Did you almost forget this was a REDACTED FOR FEAR OF LEGAL REPERCUSSIONS product? I removed those and separated the shell from its PCB and was left with the following:
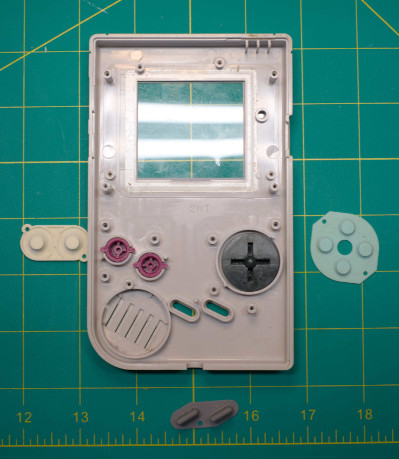 The front shell, buttons, and pads
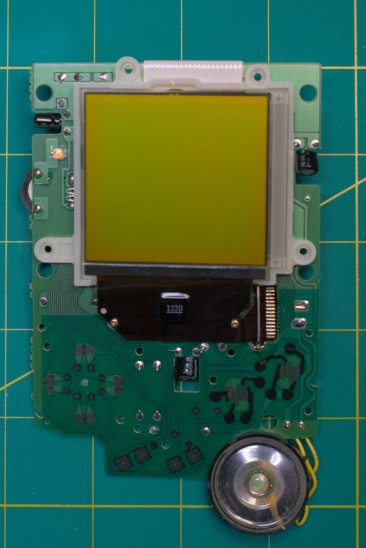 The removed front PCB and screen assembly
This is the part where it would be a good time to clean the front shell, buttons, and silicone pads. I decided I’d do that another day.
Step 2: Under the knife
Now it gets a little interesting. There’s a thin adhesive rubber/foam strip directly below the screen. This is probably supposed to be protecting the ribbon cable that draws vertical lines. If that was its purpose, it didn’t do a good job, otherwise we wouldn’t be elbows deep in a Gameboy about to remove the strip with a scalpel.
After I got a corner of the strip lifted, I switched from a scalpel/craft knife to a pair of ESD tweezers and gently peeled it the rest of the way off. It was stubborn towards the middle, and I didn’t want to force it, so I switched back to the knife and lifted the other corner, which I then peeled with tweezers until things met in the middle.
After removing the strip, I was confused. There’s supposed to be some tape or glue on here where the strip was, then it occurred to me that it was bonded to the strip and I had already removed it. I was left with only a tiny bit of it still on the ribbon cable, so I daintily removed that with tweezers as well - it’s gunk and it’s going to be in the way of the positively pissing hot soldering iron that’s going to be passing back and forth over the top of that ribbon cable for as long as it takes to get our vertical lines back.
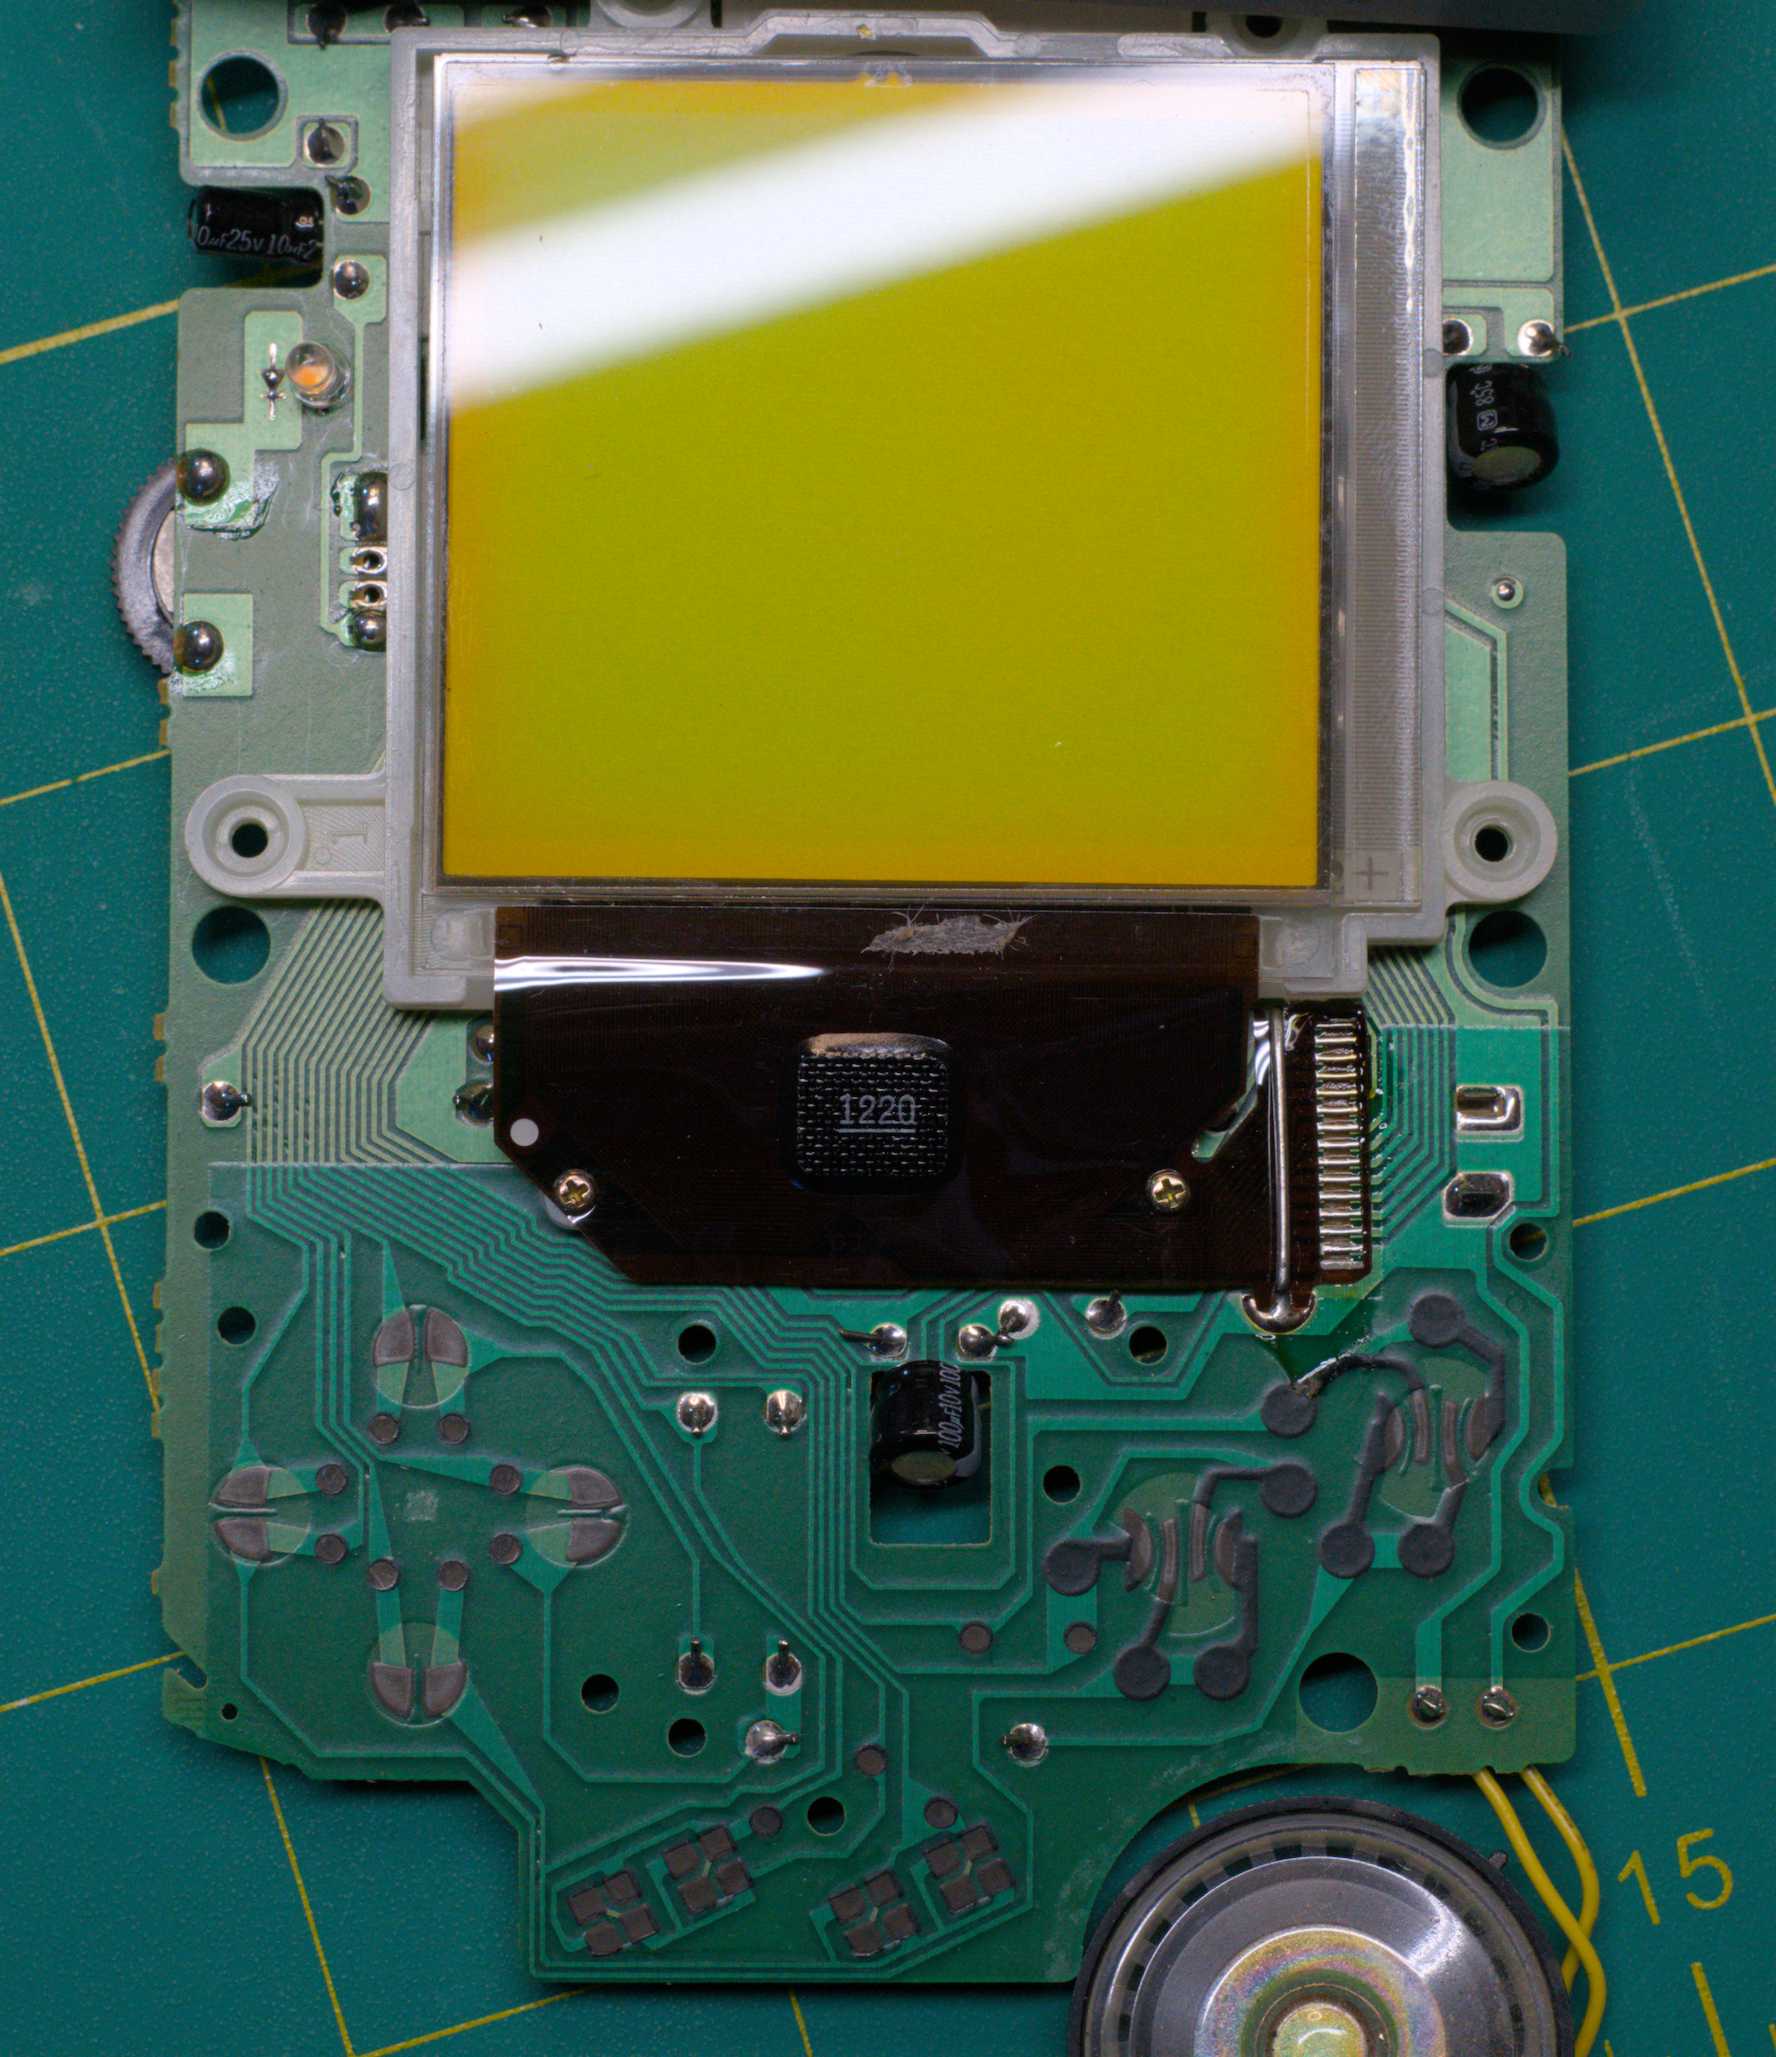 The front PCB with the rubber strip below the LCD removed. There’s still a bit of adhesive left, which I removed with tweezers
Step 3: Partial reassembly for testing
Even though we haven’t fixed anything yet (in fact we may have only broken more), we need to partially reassemble the Gameboy so that it can power on and drive the screen. This is because we need to be able to watch the lines on the screen for changes while we’re reflowing the connections underneath the ribbon cables.
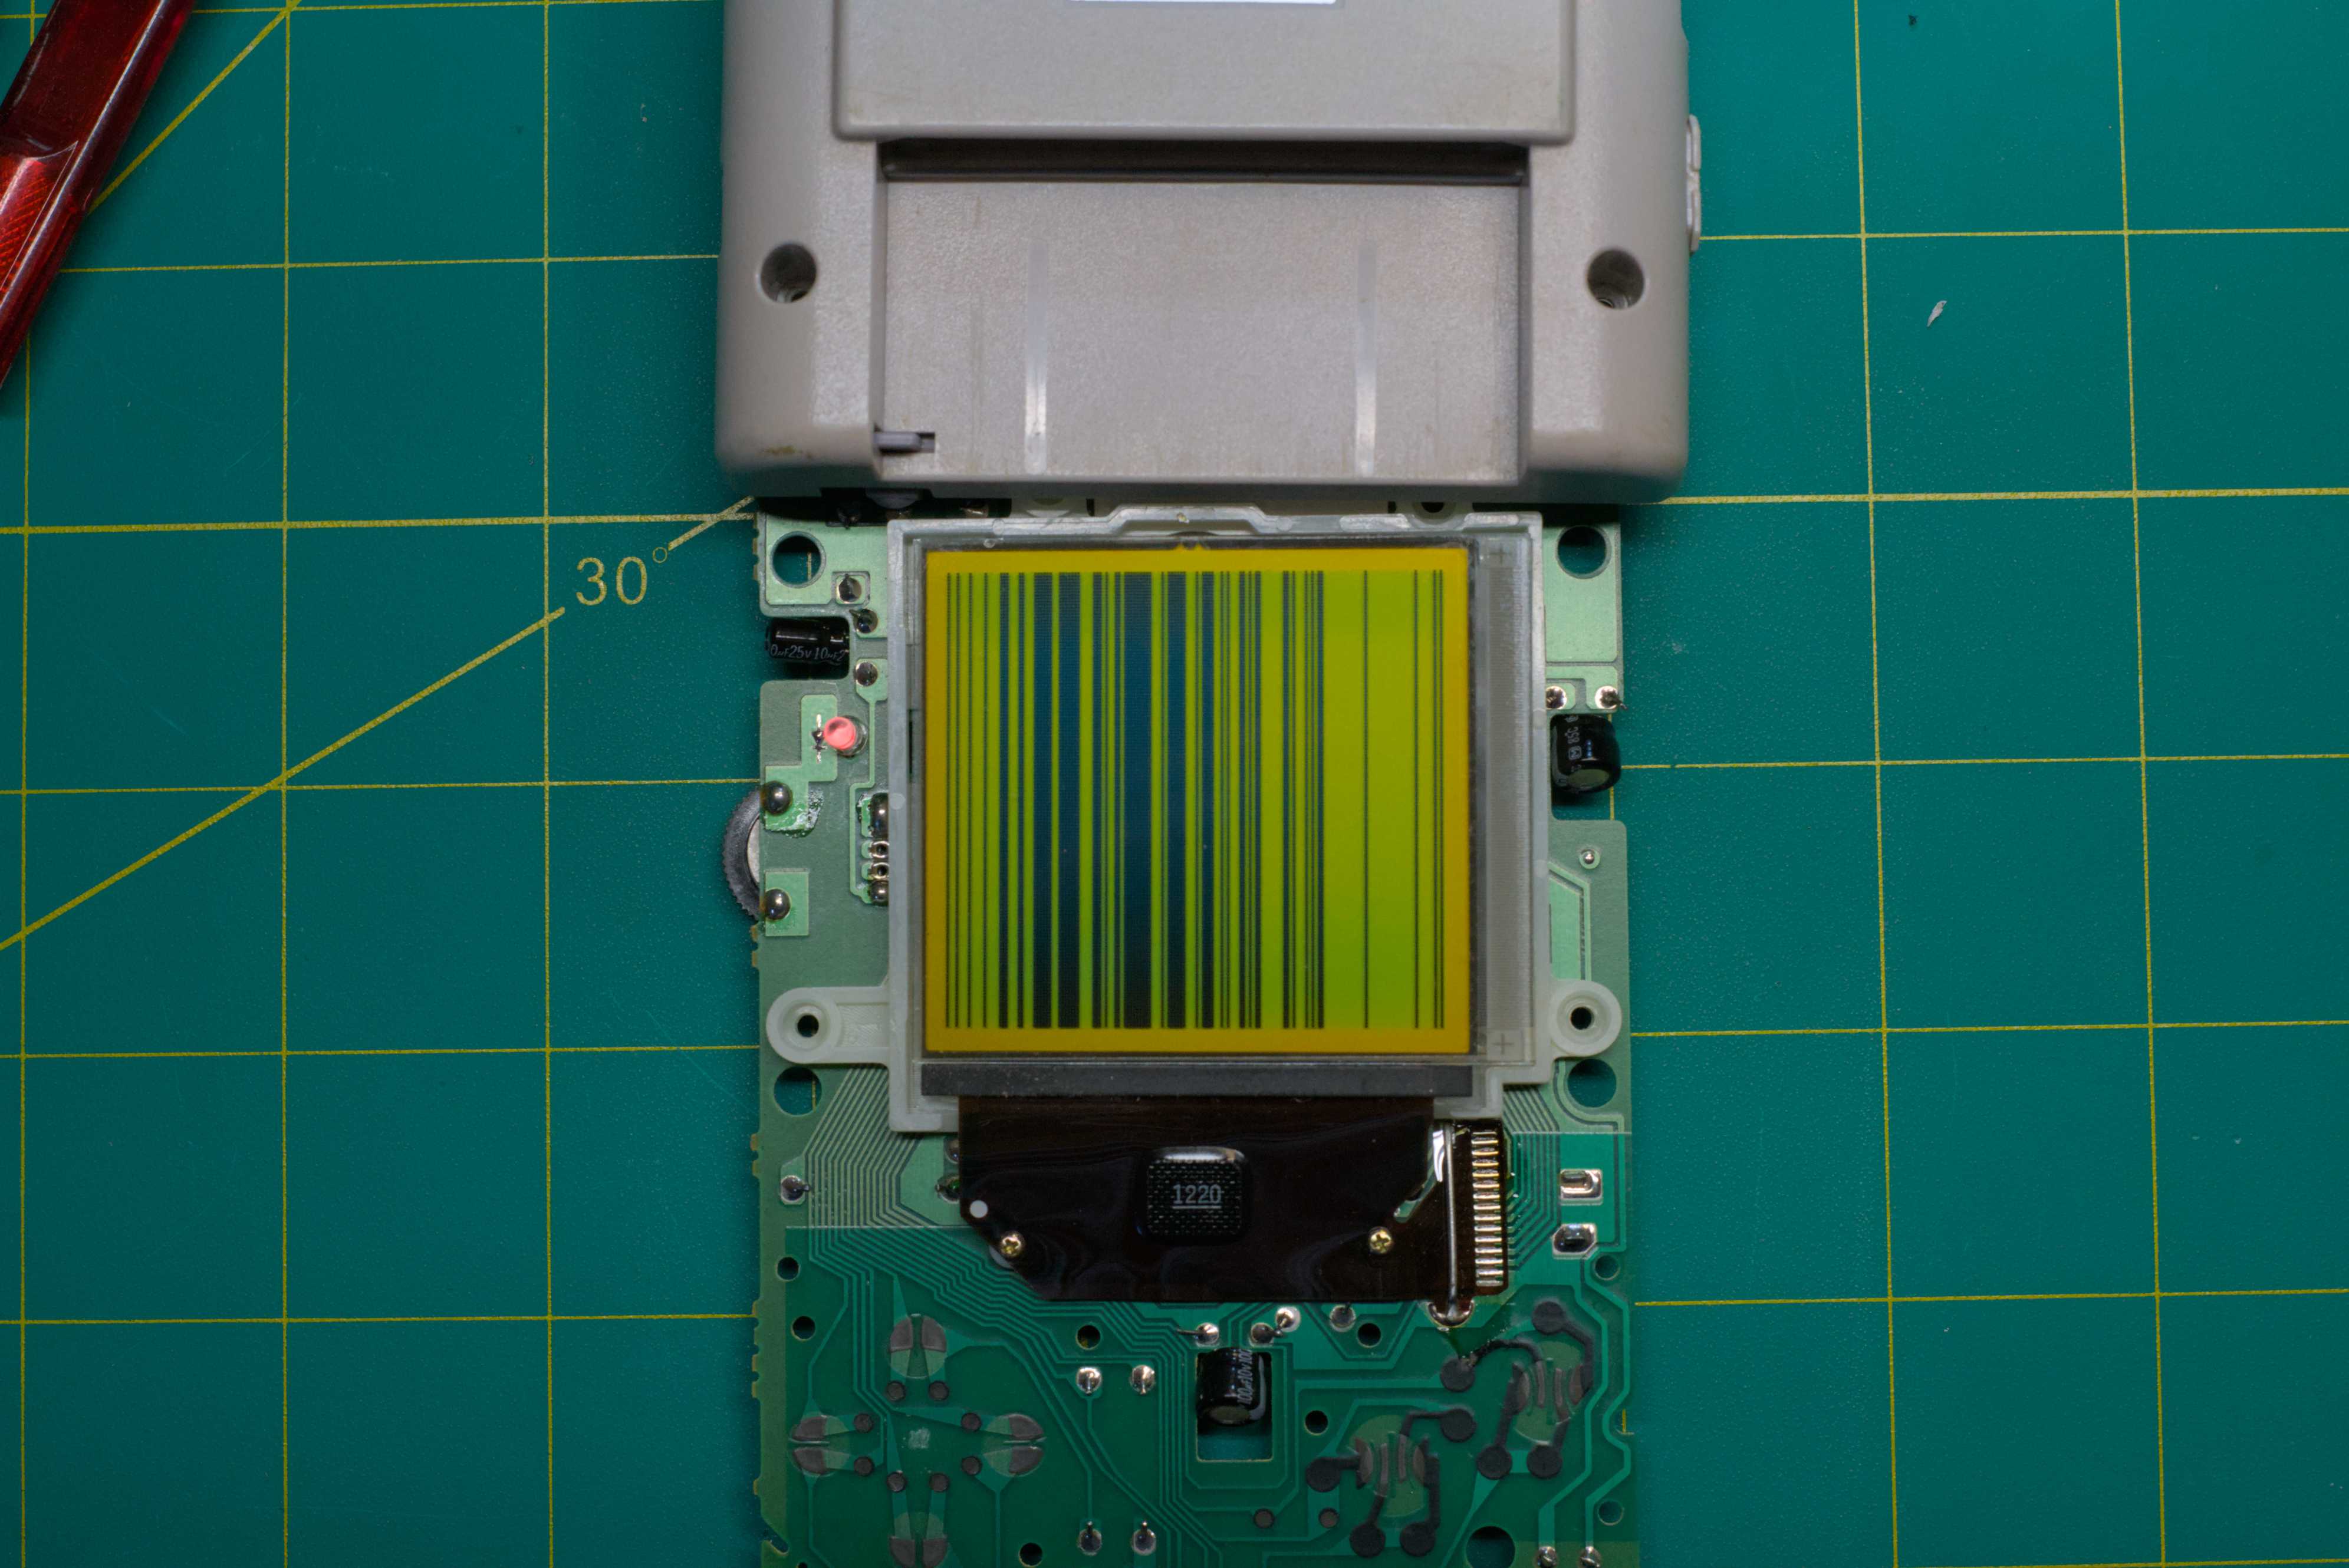
I re-attached the ribbon cable, re-inserted the batteries, and then powered up the Gameboy. At a bare minimum this tells us whether we already botched the repair job somehow this early in. Using this nifty technique I saw in a repair video, I reassembled the Gameboy in this ‘flat’ position as shown, which lets the PCB containing the screen assembly rest on the work surface instead of haphazardly on top of the main PCB, which would be a bad idea for a host of reasons.
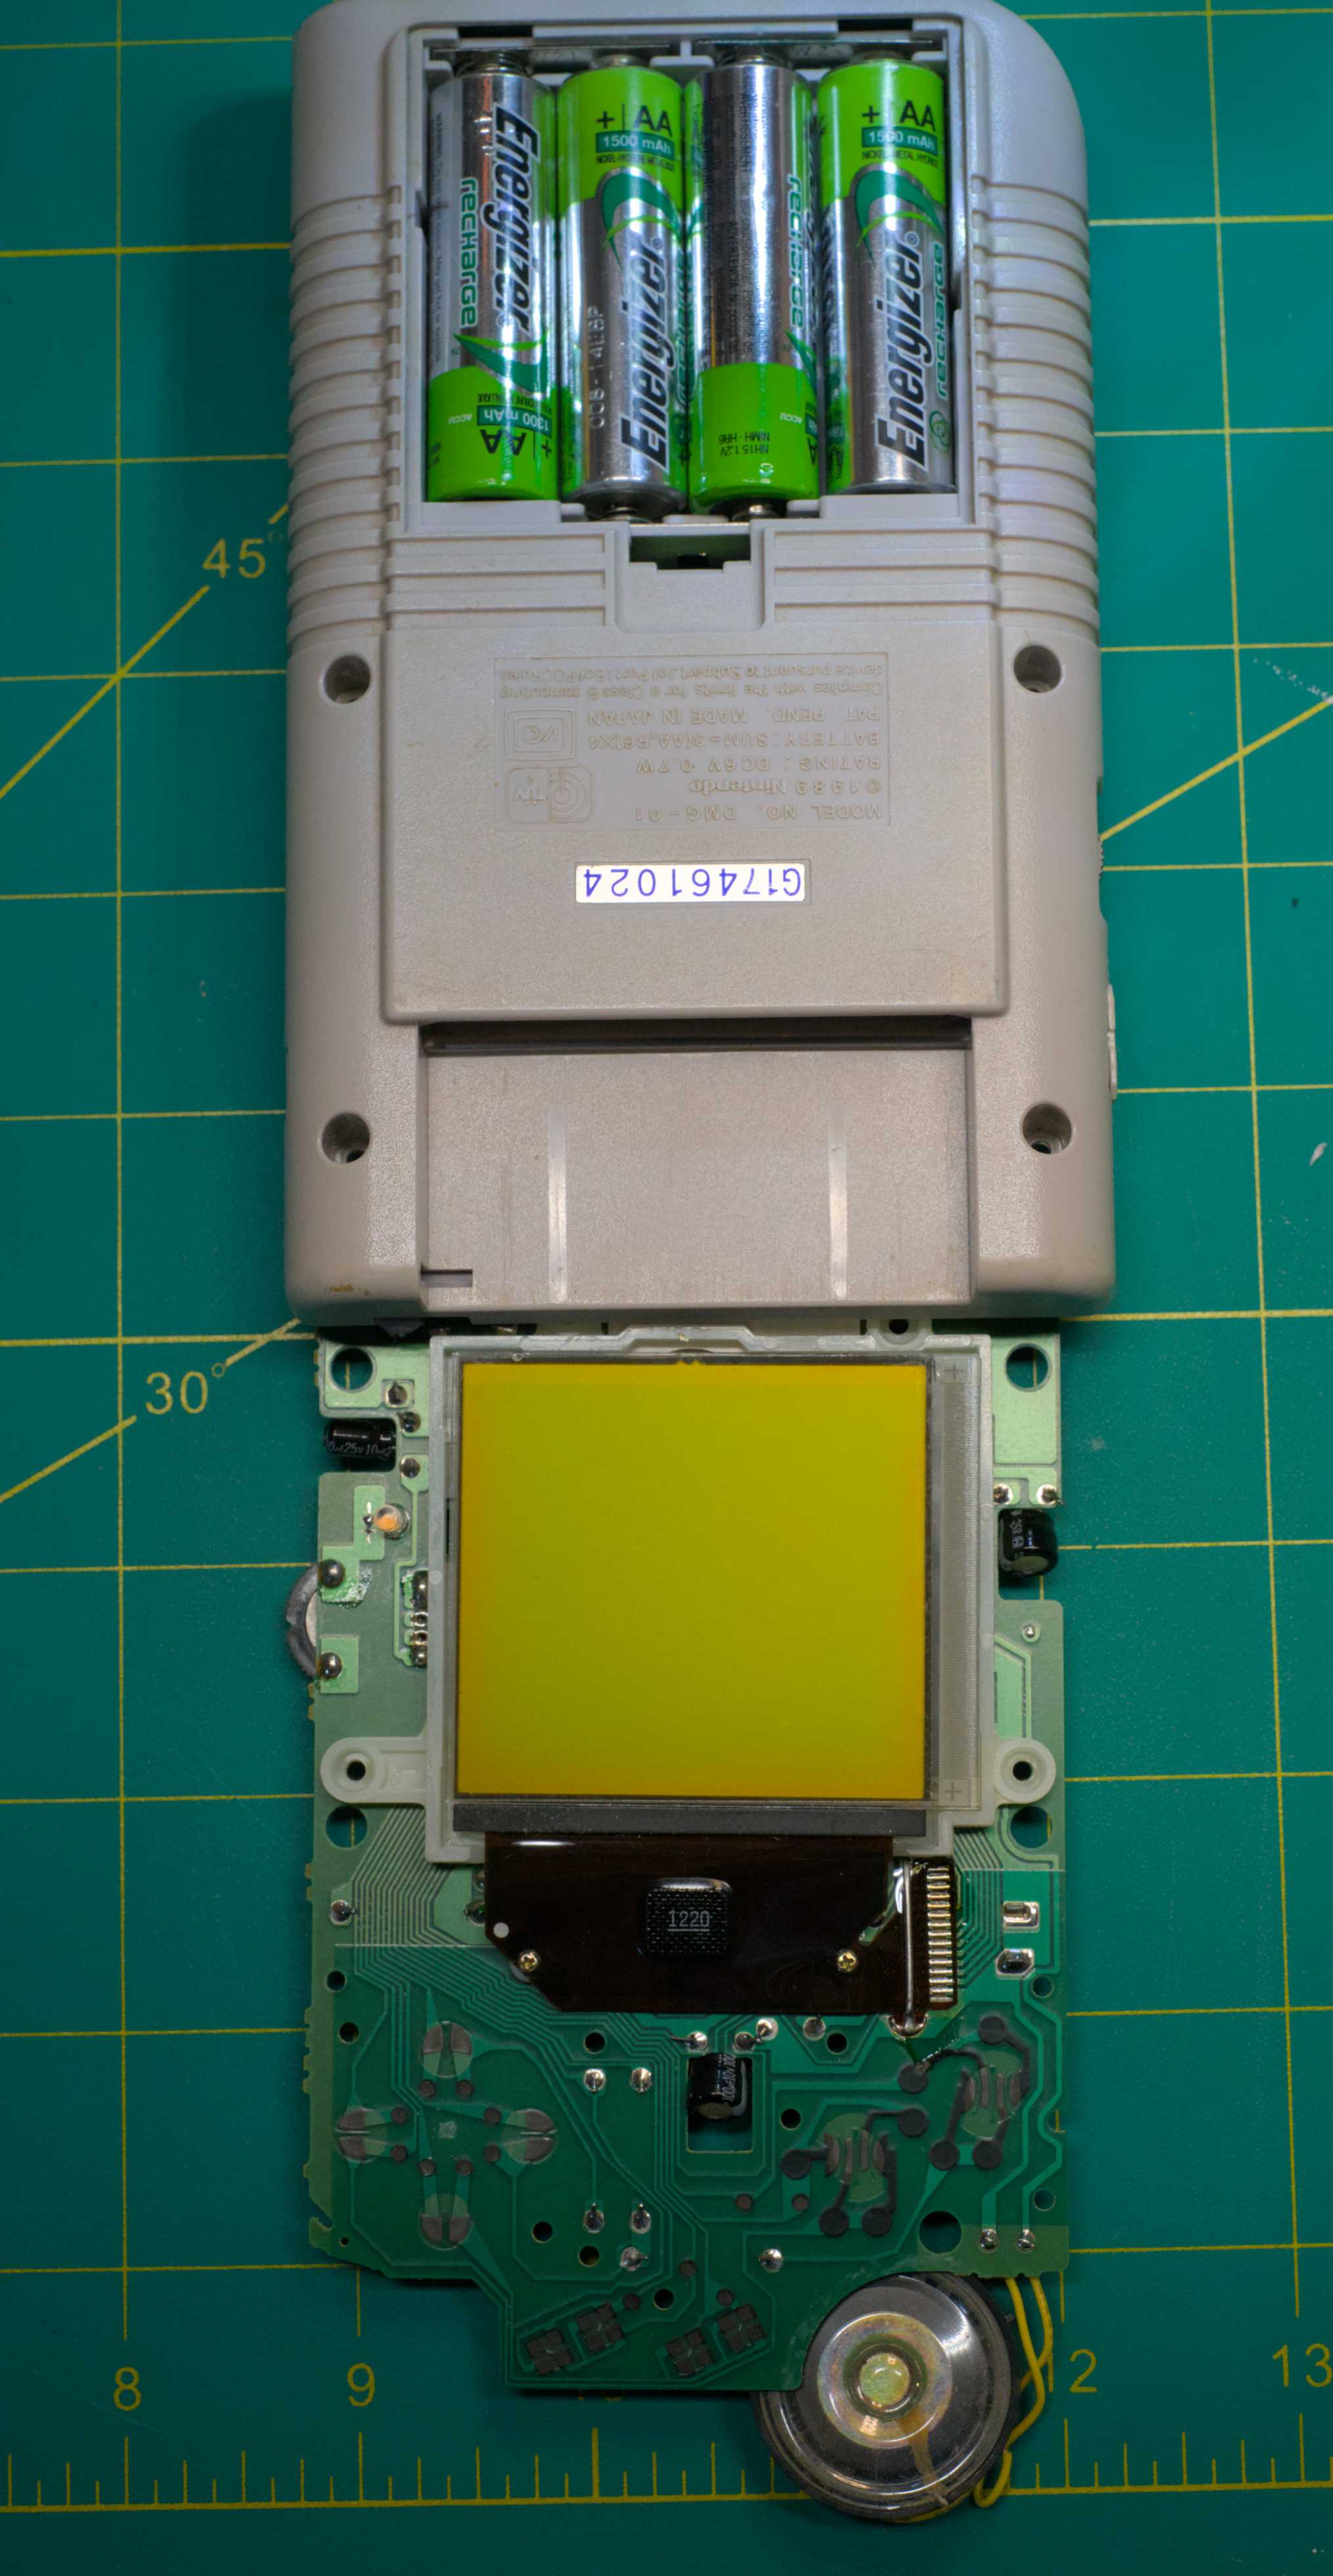 A Gameboy pancake - the rubber strip is still present because this blog entry has a confusing non-linear concept of time
Step 4: “Soldering”
Hopefully you’re comfortable because this is going to be your view for however long it takes to get every single one of these 160 lines in tip-top shape (at this point your dedication to the Gameboy may waiver):
Congrats, it’s a boy barcode!
Turn the contrast dial all the way up, so that every working line becomes fully black. Any missing line here is one that needs to be reflowed. And many of the lines that aren’t missing will get reflowed whether you want them to or not. Luckily I have just as many missing lines as unmissing.
Then I turned up my good old Hakko FX-888D to something like 520F. Later for some stubborn lines I turned it up higher, maybe 540 or 550? In either case, don’t set your iron based on my memory (unless you live dangerously) - just know that some people use a lower temperature and then turn it up a notch when the lines won’t budge.
Something I never saw mentioned online was the risk of getting either solder or flux residue onto the ribbon cable (or even worse, the surrounding area like the bare LCD). Despite being morally reprehensible, I decided the safest course of action was taking a well-used chisel tip (that in fairness had already passed its prime), wiping it entirely clean of solder, and doing the whole job with the tip completely bare. Look away if you must! Scream if you need to. It goes against every best practice for soldering, but we aren’t really soldering here. And the risk of getting gunk on the cable or screen outweighs anything else. At least your old and worn out soldering iron tips can now serve a second life? Or if it isn’t quite at the pearly gates you can fast track it there by fixing a Gameboy screen.
The actual ‘meat’ of the repair is a very interactive process and honestly best understood with a video (of which there are no shortage of available). Basically, I ran the iron over the ribbon cable and as I did, the lines underneath the iron began dancing in and out of sight. This is freaky at first, because you are going to lose lines that were working. Then they’re going to come back, and then you’re going to lose them again. You’re basically painting with a heat shotgun trying to hit 160 unique targets. A soldering iron does not feel precise here, because the connections are super tiny, so the shotgun analogy is apt here.
Eventually you’ll develop a feel for how this game works. Heat up part of the connector, get a few lines back, keep the iron moving like a hot potato, lose lines, gain lines, give the connector a break to cool off, and do it all over again a dozen times. Note that because I have so freaking many missing lines, this is the ‘hard’ mode version of this job, so I might make it sound a little more miserable than it actually is. On the other hand, supposedly the screens aren’t even necessarily able to make it back when they’re this far gone. Which means if the repair fails, it’s not really my fault. If the repair succeeds, I’ll feel like a genius for the 30-60 minutes immediately following the end of the repair.
With enough patience and perseverance, you will get to a stage where the screen stops looking like a barcode and starts looking like a black picture. For me, with only half a screens worth of lines, it did not feel like this was going to happen. The entire right 1/8th of the screen was entirely out for the count, and a single line on the very left seemed immune to reworking…
Takeaways:
- Use a sacrificial soldering iron tip that’s completely free of solder and flux residue. You won’t get any residues on the ribbon cable or LCD, but it will feel wrong.
- Keep the iron moving to avoid damaging the cable (this is common knowledge if you do any research into this type of repair)
- Patience is a requirement for results
- Using a small tool, keep gentle pressure on the ribbon cable during heating and cooling in whatever spot you think will help. It will help. Probably.
- Patience also counts when it comes to waiting for the reflow to cool. That line you’ve been trying to fix might have been fine if you let it cool for just another second
The results
Ye of little faith…
Eventually after a lot of reflowing, I did get a fully black screen. First I had to pass the denial stage that it was not in fact going to work, and then things started looking up. Peculiar.
At this point, you can power off the Gameboy and reassemble. I decided to remove the ribbon cable and reattach after trying to fold the Gameboy sandwich back together, as the cable would bend precariously along with it.
I popped in a Tetris cartridge, and there wasn’t a pixel missing :) Make sure you test again after reassembly before you begin to celebrate, just in case.
Even then, be mindful that there are probably no guarantees regarding how long the screen will continue to work. I’m not saying that because I lack faith in my handy work, or because it’s a proven fact, but just as a Murphy’s law type of suspicion - these things are aging.
I’d be interested to hear about long-term results months or years after this type of repair is performed. One would think that if the ribbon cable uses anything other than solder, it would be liable to continue to dry up or degrade. Fingers crossed it keeps ticking for the foreseeable future.